
规范git commit提交信息
发表于 阅读时长7分钟
目录
前提
公司团队在开发一个新项目的时候,团队成员决定规范提交的git信息,本人自那以后也一直遵守规则,今天有时间,自己摸索一下。
commit message
格式如下
<type>(<scope>): <subject>
<BLANK LINE>
<body>
<BLANK LINE>
<footer>
message的格式主要分为了三部分:标题行、主体、页脚。
-
标题行:简单描述更改的范围(scope)和内容(subject),必填。
-
主体:详细描述做了哪些内容改动,改动的一些思路,选填。
-
页脚:与版本冲突的代码变化、关闭的issue,选填。
type
type是提交的类型。通常为以下几种
- feat: 新特性
- fix: 修复问题
- refactor: 重构代码
- docs: 文档相关
- style: 代码格式调整,不是css样式
- test: 测试用例
- chore: 项目构建相关
平时我们完全可以在提交的时候按照以上约定的格式来写。
如果稍微懒一点,可以引入npm工具包来帮我们走这一步流程。
commitizen
借助commitizen来帮助我们生成符合规范的提交信息。
同时需要为commitizen提供一个adaptor,这个adaptor是一个约定好的规范。官网上提供了许多adaptor,我们先选一个 cz-conventional-changelog 。
我不想全局安装,选择项目安装
npm install commitizen --save-dev
npm install cz-conventional-changelog --save-dev
安装完之后再package.json中添加
"scripts": {
    ...,
    "commit": "git-cz"
  },
  "config": {
    "commitizen": {
      "path": "node_modules/cz-conventional-changelog"
    }
  },
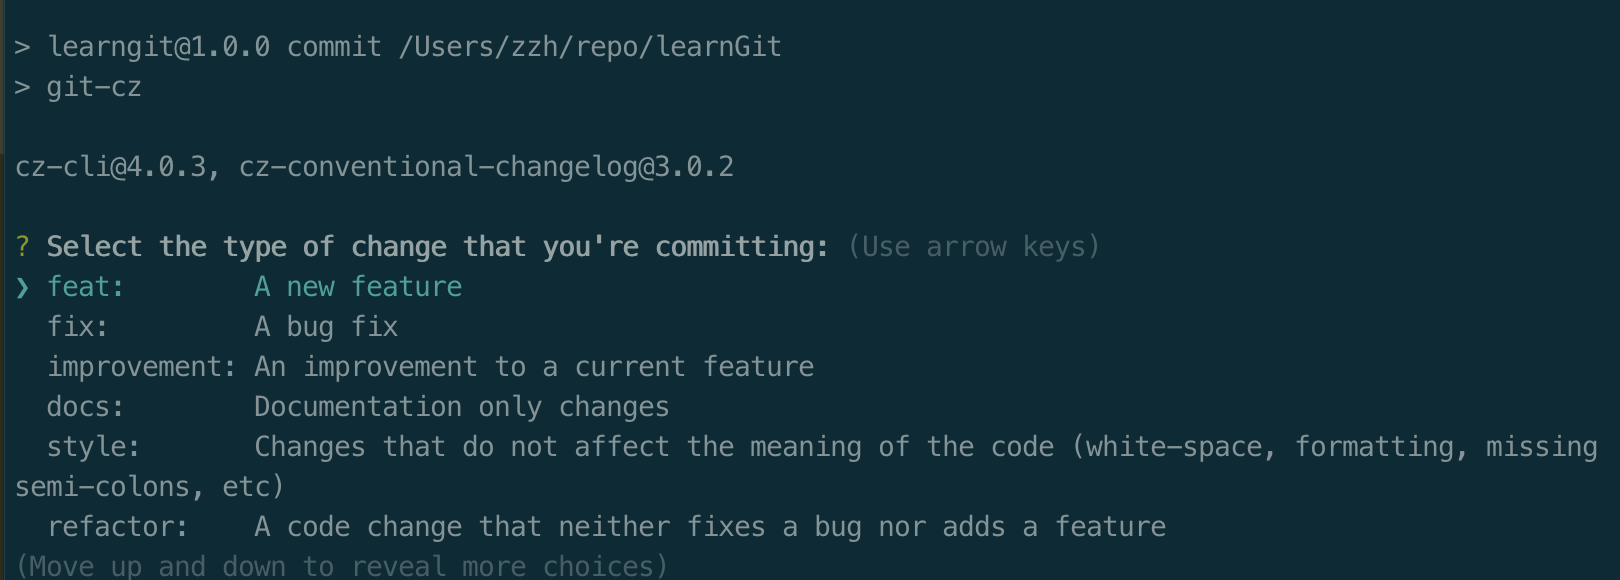
然后我们执行 npm run commit 便会看到引导内容,我们按提示完成提交信息即可。
cz-customizable
如果我们不想用别人约定好的adaptor,我们想自己约定。可以使用cz-customizable
npm i -D cz-customizable
然后将我们之前在package.json中写的config调整为
"config": {
    "commitizen": {
      "path": "node_modules/cz-customizable"
    }
  },
然后在项目根目录下创建 .cz-config.js。
我们可以先参照官网的配置例子,复制粘贴进我们的 .cz-config.js 。
目前我们可以把它的英文提示都改成中文。
配置如下
module.exports = {
    types: [{
            value: 'feat',
            name: 'feat: 新特性'
        },
        {
            value: 'fix',
            name: 'fix: bug修复'
        },
        {
            value: 'docs',
            name: 'docs: 仅更改文档'
        },
        {
            value: 'style',
            name: 'style: 不影响代码运行的格式更改\n (如空格,格式化代码,分号等)',
        },
        {
            value: 'refactor',
            name: 'refactor: 代码重构',
        },
        {
            value: 'perf',
            name: 'perf: 使项目性能提升的代码',
        },
        {
            value: 'test',
            name: 'test:  添加测试用例'
        },
        {
            value: 'chore',
            name: 'chore: 项目构建、辅助工具等\n 如文档生成等',
        },
        {
            value: 'revert',
            name: 'revert: 回滚代码'
        },
        {
            value: 'WIP',
            name: 'WIP: 待完成的代码'
        },
    ],

    scopes: [],

    allowTicketNumber: false,
    isTicketNumberRequired: false,
    ticketNumberPrefix: 'TICKET-',
    ticketNumberRegExp: '\\d{1,5}',

    // it needs to match the value for field type. Eg.: 'fix'
    /*
    scopeOverrides: {
      fix: [

        {name: 'merge'},
        {name: 'style'},
        {name: 'e2eTest'},
        {name: 'unitTest'}
      ]
    },
    */
    // override the messages, defaults are as follows
    messages: {
        type: "选择提交的类型:",
        scope: '\n指明更改的范围 (可选):',
        // used if allowCustomScopes is true
        customScope: '指明此次修改的范围:',
        subject: '针对此次修改,填写一个简单明了的说明:\n',
        body: '提供一个详细的说明 (可选). 用 "|" 来换行:\n',
        breaking: '列出此次不兼容的变更 (可选):\n',
        footer: '列出关闭的ISSUES (可选). 比如: #31, #34:\n',
        confirmCommit: '确定使用以上内容来提交本次commit吗?',
    },

    allowCustomScopes: true,
    allowBreakingChanges: ['feat', 'fix'],
    // skip any questions you want
    skipQuestions: [],

    // limit subject length
    subjectLimit: 100,
    // breaklineChar: '|', // It is supported for fields body and footer.
    // footerPrefix : 'ISSUES CLOSED:'
    // askForBreakingChangeFirst : true, // default is false
};
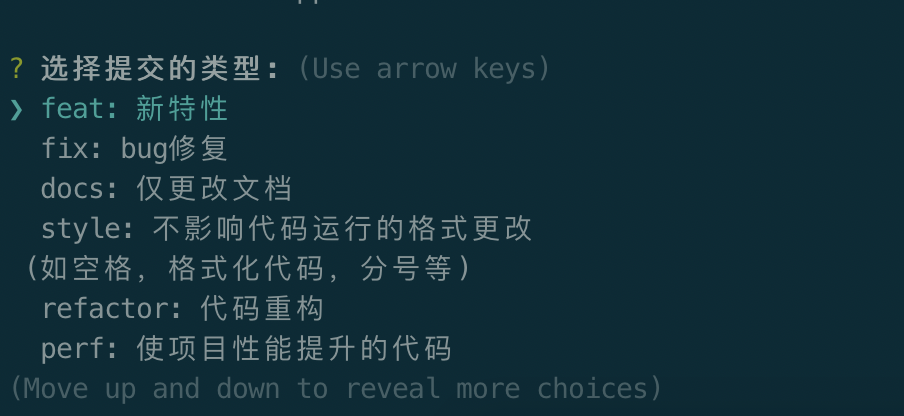
当我们执行 npm run commit 时,便如下图
commitlint
有时我们为了节省时间,没有使用 npm run commit 来走以上的流程,直接提交自定义commit信息。虽然可以提交成功,但我们之前的努力似乎就白费了。因为一旦开始随意提交,后面便不会再想按流程来走。因此,我们需要校验提交的信息,如果不符合规范,直接拒绝你的提交。
commitlint可以帮我们校验,同样它也需要一份配置文件。
首先安装commitlint
npm i -D @commitlint/cli
然后安装校验的配置
npm i -D @commitlint/config-conventional
然后我们创建配置文件
echo "module.exports = {extends: ['@commitlint/config-conventional']};" > commitlint.config.js
commitlint.config.js 也可以命名为 .commitlintrc.js , .commitlintrc.json , .commitlintrc.yml ,甚至可以在package.json中配置。
commitlint-config-cz
就如刚才我们使用了自定义的adaptor来约定commit的格式,我们也可以自定义校验的规则
npm i -D commitlint-config-cz
然后我们修改刚才生成的校验配置
module.exports = {
  extends: ["cz"]
};
查看官网rules, 我们随便在 commitlint.config.js 中添加一些rules
module.exports = {
    extends: ["cz"],
    rules: {
        'type-enum': [2, 'always', ['feat', 'fix', 'refactor', 'docs', 'chore', 'style']],
        'scope-empty': [2, 'never'],
        'subject-empty': [2, 'never'],
        'type-empty': [2, 'never']
    }
};
这里我主要是规定了主要的标题行的内容不能为空。
husky
使用commitlint需要搭配husky使用
npm install --save-dev husky
然后在package.json中添加配置
{
  ...,
  "husky": {
    "hooks": {
      "commit-msg": "commitlint -E HUSKY_GIT_PARAMS"
    }
  }
}
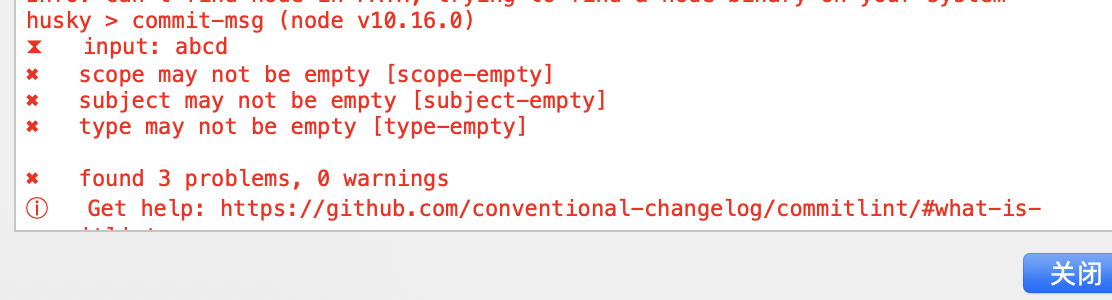
这样当我们提交时,如果提交的信息不符合规范,便会提示报错。比如我随便写了个abcd,就报错了,如下图。
总结
整体的大体流程如上,周末愉快。